Setting up sandbox test users for CloudKit development
- Apr 13, 2018
- 4 min read
Inspired by this post on getting started with users and images in iOS CloudKit, I thought, "Hey, that was helpful. I should share some of the stuff I'm learning as well." And so this first post on the new blog came to being.

On of the most obvious problems with developing on CloudKit is that you can't just sign up a bunch of users with fake email/pw combinations like you can with services like Parse Server. Much like Facebook connect, your device is tied to iCloud. So how do we generate multiple sandbox test user accounts? That was what I was trying to work out today.
So in this tutorial, we're going to create a bunch of REAL email accounts. Next, we'll create some test users in iTunes connect. Then we'll use these test user accounts to actually sign on to iCloud on your test device(s). Finally, we'll write some code and make sure the new users have moved into the public database.
Set Up Email Accounts
Unlike sandbox testers for inApp Purchases, with iCloud, each test user requires an actual email. If you already have unused email accounts, you're all set. Jump ahead to the next section.
If you don't have unused email accounts, let's make some. Since Yahoo, Gmail, etc. tend to be a chore with account creation with multiple accounts, head over to yandex.com. It's free and easy to use to crank out multiple accounts. Make as many test accounts as you need. When you're done, in any logged in account, click on your profile image and add all your accounts into your open session so you can do everything without having to log on and off.
I strongly suggest you use the same passwords for these emails as you will for the account records below. Otherwise you could end up getting mixed up and having to reset your tester password...err...like I had to.
OK, armed with a few real, live emails, head back to iTunes connect and just go through the process of adding each user.
In iTunes Connect
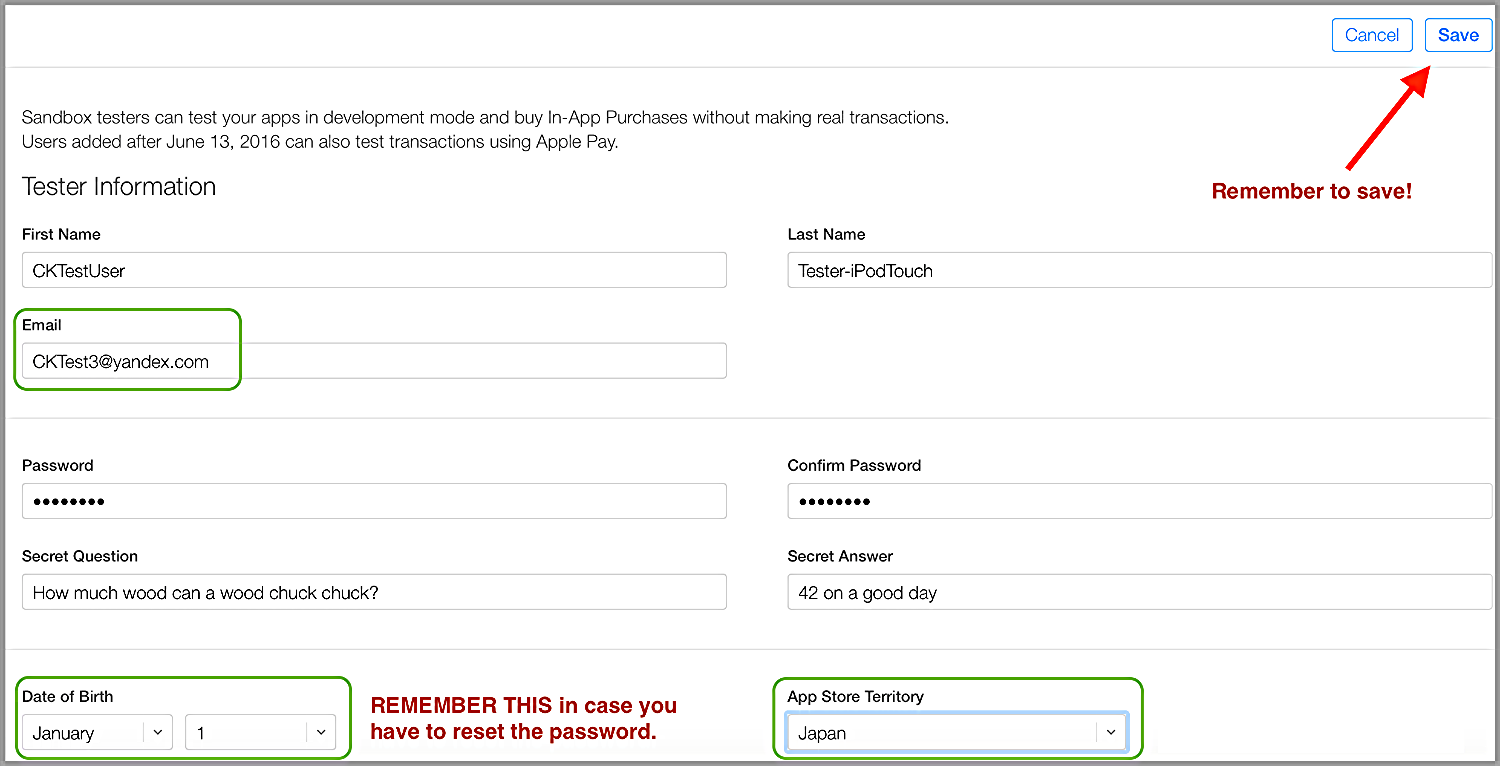
Head over to iTunesConnect. Click on Users and Roles > Sandbox Tests > Add new tester

I don't think the region matters, but just to make sure there were no issues, I used the same region (App Store Territory) as my actual iTunes account.
Use the same Date of Birth for all your profiles in case you need to reset your account.
Verify Emails
After you finish, head over to your email accounts. Apple will have sent you some emails to verify your Apple ID. Click on VERIFY NOW and you'll go to the apple site.
Don't worry. This does NOT sign you out of your regular iCloud account.

Enter:
1: The SANDBOX tester email (not your actual iTunes Account email)
2: The password you used to create the SANDBOX tester in iTunes Connect.
If all goes smoothly, you'll see the verified screen, and you're ready to roll.

On Your Test Device
Time to set your iCloud account to the test account. So on your test device:
1. Settings > iCloud
2. Don't touch your iTunes Account. Just stay logged in as usual. If you try to sign in using a sandbox account, you'll get an Apple-slap on the wrist.
3. Sign in to iCloud using the tester email and the password you chose when creating the sandbox tester profile. If you have multiple devices all signed into the same iCloud account, you only need one of those, so for the other devices, scroll to the bottom and Sign Out.
You will always be asked to provide the account password when you sign out, so again, don't lose these passwords!! (Although you can always reset them if you do).

4. The sign-on and sign-off steps can take a couple of minutes in some cases, especially with older devices. Eventually, you'll get an action sheet asking if you want to merge. Choose Don't Merge.
5. Turn on your iCloud Drive if it's not already switched on.
In Xcode
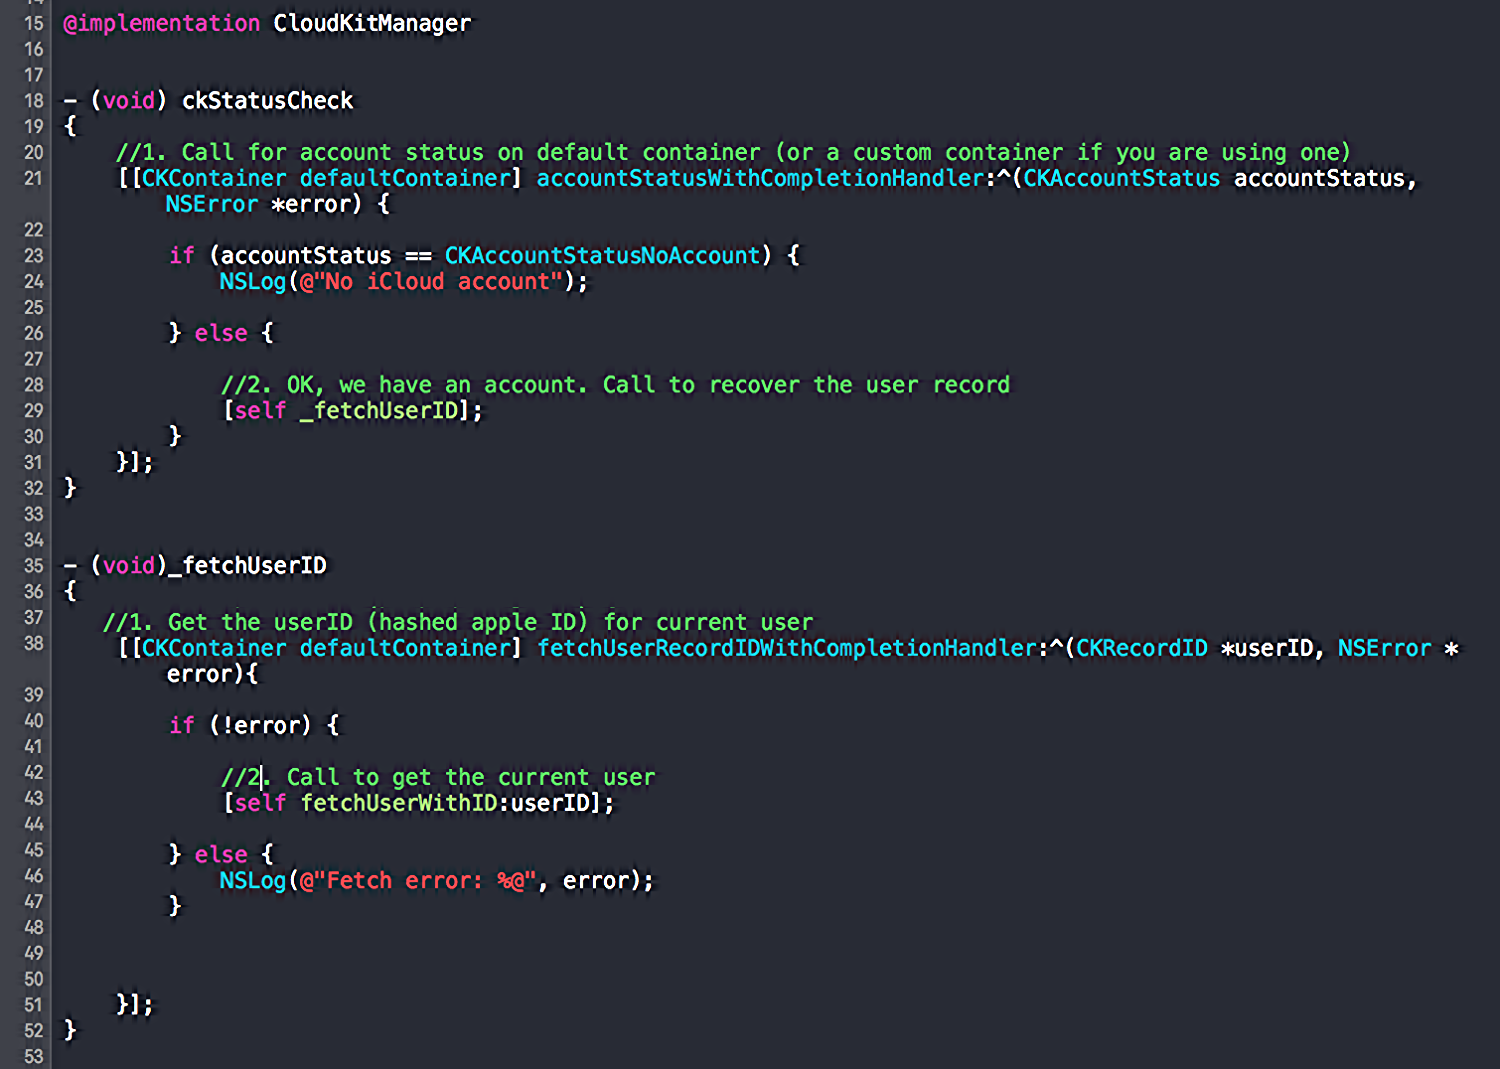
To test that your users are indeed iCloud ready, just run some test code. I call the ckStatusCheck method below from the appDelegate to a CloudKitManager class I'll be using as a wrapper between my actual managed objects in the project and their corresponding forms as CKRecords. Do this, and then next time Parse.com or whatever service you're using decides to close, it will be relatively easy to change the networking code.
Although this code is just for testing, checking for an active account etc. are all things you'll need to do later anyway (just be sure to build in appropriate error handling). I just hacked this out to test stuff as I'm figuring out CloudKit.
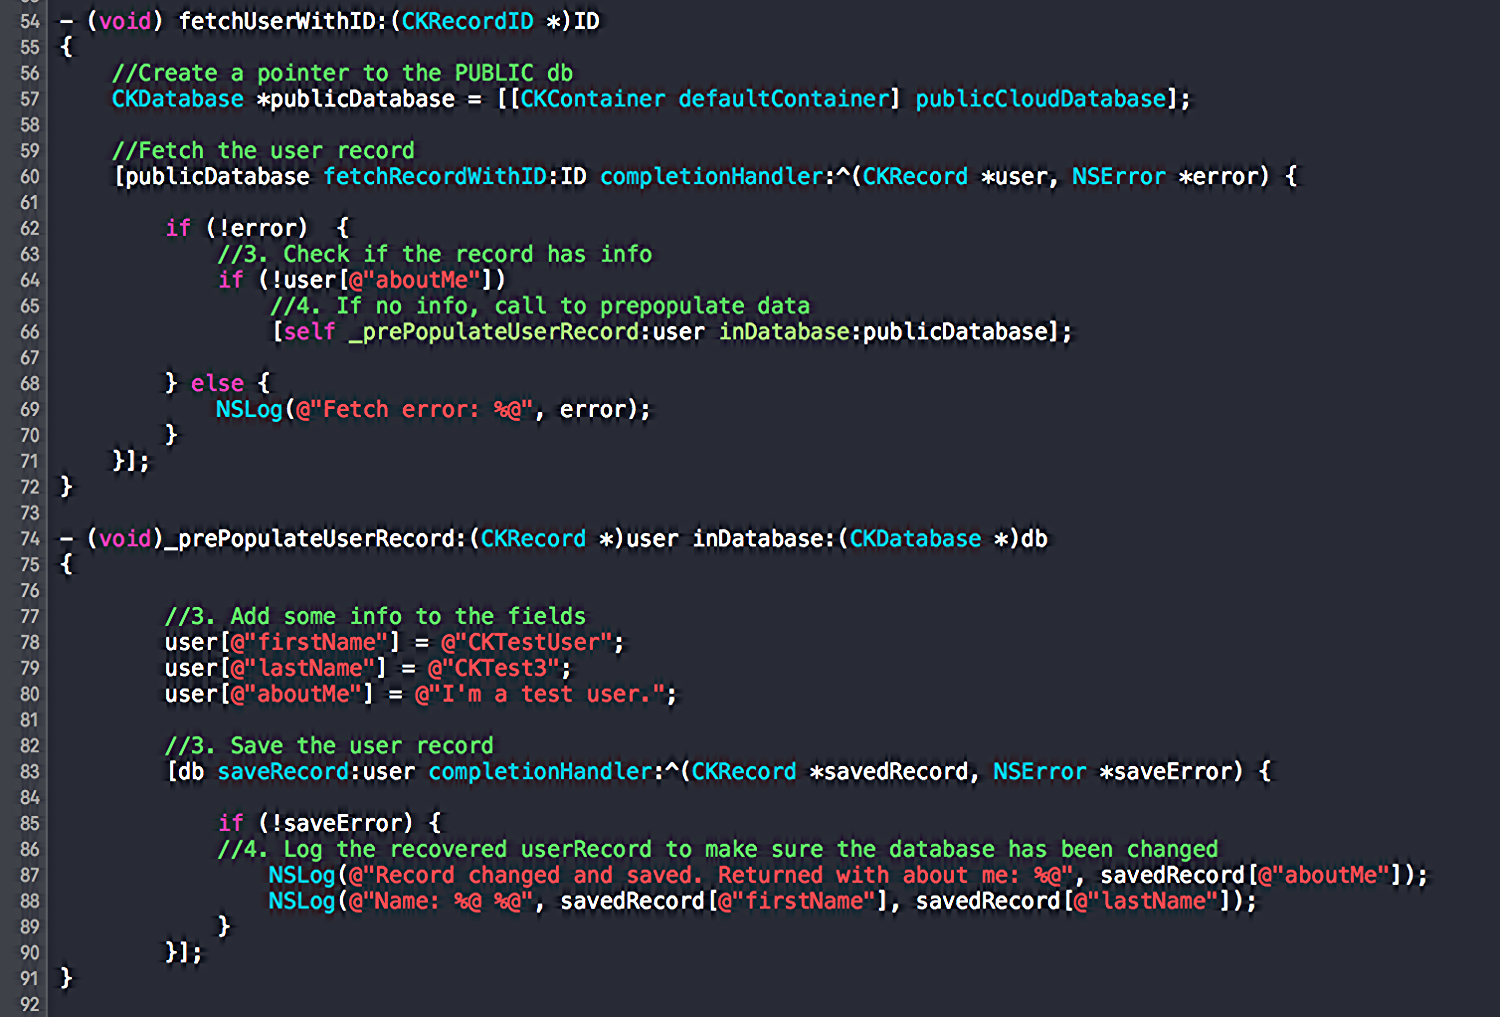
My User records have three NSString fields: firstName, lastName, aboutMe.
1. Check that the user is logged in to an iCloud account
G
2. Get the UserID for the current user. This is part of the two-step process it takes to access the current user record.
3. Use the ID to find the CKRecord of the current user.
4. If the record is new, add some data and save it. The log the returned user object to make sure the information was successfully saved.
OR, to see this in the Xcode color scheme we all love...
(Click images to open zoomable code snippets)
Build on your device. The log will show that the record was changed.

In CloudKit Dashboard
And in the dashboard, BOOM! There it is. A shiny new test account. Enjoy hanging out with your new test users!

Comments